Sunday, October 3, 2010

8" Rebuild Complete!

The finished 8" Scope in the Hocking Hills

I finished the 8" scope last weekend to make sure I was able to take it with me to the Hocking Hills.  The scope has exceeded my expectations in many ways, but first, some details on how I finished it.


I followed the same design as my 12" and 16" scope except this time I build a tripod mount for the scope.  I reused the same struts and secondary ring.


Close up of the back of the mirror box.  I had an extra weight left over to add some weight to the back end.  It is a little tail heavy, but that is easily remedied with a finder scope.


Here is the leg/ground board interface.  I used a couple pieces of 3/4" birch plywood glued to the sides of a couple 3/4" pieces glued together.  I really like the way the end plies look.  A 3/8" bolt attaches the legs to the ground board.


I had a set of chains from an existing tripod that I no longer use and attached them to the legs.


I got the opportunity to use the scope out under dark skies this past weekend.  The scope worked very well.  In fact, it worked so well, I forgot about the scope altogether!  The action was nice and smooth, with quick dampening of any vibrations.  I spent about 8 hours combined between the two nights picking off all my favorite objects and concentrated on a bunch of new objects in Cetus, Sculptor, and Aquarius.  Jupiter looked so wonderful on Friday night.  Nice detail.

I have a feeling this will become my favorite scope soon.

Ok, what will my next project be?!?!?

Sunday, September 19, 2010

8" Rebuild

Been a little while since I last posted as I have been off doing summer type things.  I did start a new project: I am rebuilding my 8" ball scope to be build the same as my 12" and 16" scopes.  My ball scope journey has run its course and it is time to put it to rest.  Some of the reasons I am moving to a dobsonian type mount instead of the ball scope mount is weight, design flexibility, and of course, an excuse to build a telescope!

With this scope, I hope to use as much scrap wood left over from my other projects as I can.  I also have a bunch of extra hardware.  I will reuse the secondary ring and struts from the existing ball scope.  This scope will also be mounted on some type of tripod to being the eyepiece up higher.  I figure the rocker box will be about 18" off of the ground to give me good eyepiece height.  I think the tripod will be a challenge, but I am up to it!


I plan to use the same 3 struts from the ball scope like you see here.  The mirror box is the same configuration as my other two scopes.  I am using glue and finishing nails to put the pieces together and they seem to be strong enough for a little scope.


Like the 16" scope, I am using some wood glue and brass inserts to attach the bearings.  I plan to retrofit my 12" the same way.  All wood will be baltic birch plywood and dowels.


The bearings are 12" in diameter and 3/4" thick.  The bottom of the mirror box is 3/4" thick
 and everything else is 1/2" thick.  The two dowels are 1" baltic birch dowels.

More to come!


Tuesday, April 27, 2010

The Sucker Hole Debut!

Here is the debut of my new web comic: "The Sucker Hole"

Tuesday, April 20, 2010

Issues with Contrast

I have long known that my 12.5" telescope suffers from contrast issues.  I would constantly compare my scope to others and see a noticeable difference.  The 16" also suffers from this malady.  Contrast issues can be one of two things, overall contrast (i.e., grey background skies) and small contrast (i.e., fine planetary detail).  My problem is with overall contrast where the faint wisps of galaxies can be lost in the grey background sky.  This type of contrast problem boils down to unwanted light sneaking somehow into the optical path.

I went searching on the net on ways to solve it and I found a post on www.cloudynights.com that discusses how you can identify where that light is coming from.  Mike Jones wrote an article in Astronomy Technology today that describes that technique.  Essentially, you use a long focal length eyepiece and a another eyepiece stacked on top of it.  Mike says in his forum post: "The second eyepiece must have a real focal plane such that you can use it like a loupe, like an orthoscopic, Plossl, etc."


I used a 35mm University Optics Konig and an 18mm University Optics Orthoscopic.


When you look into the top eyepiece, this is the view you get:


As you can see, in my 12.5" scope, the white screws and the pink of the dew heater reflects a lot of light.  You would think that it would not be a problem, but it does contribute to the overall brightening of the background sky.  Any light scattering is a bad thing!  When I did this on my 16", I noticed that there is light reflecting off of the secondary shroud (the piece of metal that holds the secondary in place).  It is painted flat black, but there is enough to cause problems.  I added some flocking paper to the secondary shroud and part of the spider hub:


This noticeably darkened the view at the eyepiece.  I redid the test recently when I was observing at a darker sky and it showed a considerable darkness around the primary mirror.  In other words, the primary mirror appears to float in blackness.


For my 12.5", I plan to do something to block the reflected light from the "stuff" above the secondary mirror.  I also plan to replace the spider and the secondary sometime soon with a Protostar.  But that comes after the 8" is done.

Saturday, April 17, 2010

New Moon Photographed!

France's Thierry Legault has imaged a new moon.  It is truly amazing feat!

http://astrosurf.com/legault/new_moon_2010april14.html

I have always wondered if it is possible to take a picture of the new moon and it appears it is.  However, the technical challenge of doing so is pretty interesting.  Félicitations Thierry!

Thursday, April 15, 2010

Grieser Field Observing Report

Electa and I's first night out under dark skies


Some fellow club members and I headed out to Grieser Field to enjoy and evening of deep sky observing.  It was new moon, and the weather forecast was calling for clear skies.  Jim and I got there first, braving rush hour traffic.  Both of us almost got in accidents!  Thankfully that did not happen.  We arrived well before sunset and set up our telescopes, enjoyed Subway subs, and discussed the evening observing plans. The sky was still soupy from stubborn high Cirrostratus clouds and contrails and were were both worried that they would not clear off.  Tim showed up just before sunset.

Jim brought his 12" Teeter.  I brought "Electa", my 16" truss dobsonian I just finished.  Tim brought a 10" Orion Dobsonian.  Tim just purchased a 15" Obsession and Jim and I were giving him a piece of our minds for not bringing it!!  We want to look through that thing!  Tim has some tweaks to finish on it prior to using it, but he assured us next time, it will be available.

As twilight settled in, we caught brief glimpses of Mercury dodging in and out of the clouds.  Venus burned brightly and steadily.  The brighter stars started to peak through the soupy muck above us.  My heart started to sink.  May as well sit back and relax for a bit and hope the sky gets better.

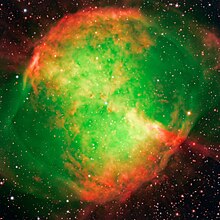
Night arrived and the clouds really started to dissipate away.  After some final tweaks to collimation, I started picking off some random objects including M35, M37, M47, M46, The Eskimo Nebula, and more.  I brought my sketching materials to rekindle my fondness for sketching deep space objects.  I have always wanted to sketch NGC2362, a beautiful open cluster off the tail of Canis Major.  Mark Watson, a long time club member, bequeathed the title of "The Porch Light" because it appears like a group of moths are flying around a porch light.  Initially, I started sketching using my 13mm Nagler, but I find I don't do well with a large field of view.  So I plopped my 12.5mm Orthoscopic eyepiece in.  Ahh, much better.

"The Porch Light", NGC2362

Once I finished NGC2362, I looked up and noticed the sky was getting really clear!  I glided the telescope up off the handle of the Big Dipper to have a glimpse of M51.  The arms are clearly visible!  I stopped by some other familiar targets, NGC4565, M64, M63, and more.  I wanted to continue to sketch some more objects so I decided to hop over to NGC4762 and 4754, a nice pair of galaxies off of Vindemiatrix in northern Virgo.  Ron Ravneberg really enjoyed this pair and I was introduced to them by Jim not too long ago.  They are quickly becoming a favorite pair or mine too.

NGC4762 and 4754

While I was sketching, Jim was calling out cool objects he was looking at.  Tim was amazed at M51 in his telescope.  Once I finished sketching, Jim gave Tim and I the grand tour of the Virgo Cluster.  We would all start at the "Smile" in Virgo, and Jim would then guide us both throughout the cluster.  It was a good time.  We probably spent half and hour going through everything!  It was a hoot.  I would use my green laser that is attached to my scope to make sure I was in the right place as Tim and Jim could see the laser in their finders and eyepieces.

The temperature was not too bad and stayed into the 50s for part of the night.  Then it quickly started getting colder as the night got clearer.  I noticed a tick crawling on my hand.  Jim and I took a walk earlier and we pulled off about 12 ticks from our pants.  They were hungry!  I was picking off "phantom ticks" throughout the night.  My mind was playing tricks on me!

I spent most of the middle part of the night going through my observing run.  Picking off galaxies in southern Virgo, working my way up towards Spica.  I had some detailed charts of 3C273 so I went off and searched for some ancient light.  I quickly found it, and shared the view with my observing partners. The light from 3C273 left there around 2.6 billion years ago.  Back when the earth was mostly covered in primitive algae generating Oxygen in the primordial atmosphere.  Amazing!!

The highpoint of the night for me is when I got to look at the Coma Cluster.  We were seeing a lot more galaxies than I have ever seen.  We counted 10 galaxies I believe!  In the past, I could only detect about 3 or 4.  This was turning out to be a good night!!

I continued looking for more galaxies.  Jim gave me a chart to search for comet in eastern Virgo.  And from there, I did some more galaxy hopping.  I got to see Hickson 67 which is a nice compact group of galaxies.  I think I may want to start hunting these galaxy groups down.

Next I attempted to sketch M104 in Virgo.  It proved to be somewhat of a challenge.  I wanted to make sure the dark lane was apparent in my sketch like it was in my scope.  Many eraser marks later, I got this:


It was not that bright, so I still need some tweaking done on the sketch, but it sure was fun to draw!

I played around in Leo for a bit before going on to sketch the Siamese Twins in Virgo.  I like interacting galaxy pairs and this was a nice one. 

NGC4567 and 4568, The Siamese Twins

Along the same lines, another interacting pair is the pair off of Charr in Canes Venetici, NGC 4485 and 4490.  This group is a fairly large set of galaxies in my 18mm Ortho and a fine specimen to draw.

NGC 4485 and 4490

I finished the night looking at the early summer sky enjoying old favorites like M27, M57, M17, M8, and M20.  Dawn started to tinge the sky and it was time for bed.  It was a great night.

Tuesday, April 6, 2010

Planetary Nebulae

The Dumbbell Nebula - ESO

"Will the sun blow up when it dies?"  I have been asked that question numerous times during a public program at Perkins Observatory.  I inform them that no, the Sun will not blow up at the end of its life, but it will quietly live out it's last days as a planetary nebula.  The sun is an average, middle aged star.  It has existed now for over 4.5 billion years.  It should keep burning for another 5 billion years before it becomes a red giant, when the outer layers of the sun's atmosphere starts to expand and the core starts to heat up and contract.  After the red giant phase, the outer parts of the atmosphere will be thrown off due to thermal pulsations leaving a white dwarf at its center.  This is the planetary nebula phase that most main sequence stars like our sun spends its retirement.

The Eskimo Nebula - NASA, ESA, Andrew Fruchter (STScI), and the ERO team (STScI + ST-ECF)

Planetary Nebula are becoming my favorite objects to observe.  They usually have a high surface brightness which makes them quite noticeable even in my suburban skies.  Some favorites that can be seen this time of year include the Eskimo Nebula in Gemini, The Ghost of Jupiter in Hydra, or one of my favorites, NGC2438 that appears to lie in the open star cluster, M46.  They are fun to hunt down due to their smaller size.  I enjoy using my orthoscopic eyepieces to get nice, clear, high magnification views to coax out the smallest details.  For example, this past Saturday evening, my observing partner and I were up at Perkins Observatory.  I was using my 16" scope and a 9mm University Optics Ortho, and noticed the bright ring in the Ghost of Jupiter.  It was a great view!  It was glowing a bright blueish-green.  The Eskimo Nebula was showing nice detail in its core.  So much fun!

The Ring Nebula - The Hubble Heritage Team (AURA/STScI/NASA)

There are other great planetary nebula to view throughout the year.  The Ring Nebula is one of the most famous.  The Dumbbell Nebula is another.  Some planetary nebulae appear to be blueish-green, but some are very blue like the Blue Snowball in Andromeda.  An Oxygen III filter can sometimes reveal more detail or cause a faint subject really stand out.  Others, like the Blinking Planetary in Cygnus, will blink out of view when looking directly at it.  But when you look away, it pops into view!

Planetary nebulae are fun to hunt down and enjoy.  They represent the last stages of an average star's life and have many different shapes and sizes represented.  I hope you enjoy them as much as I do.

Clear Skies

- Photos are public domain images from

Friday, April 2, 2010

Under darker skies...and more refinements

Last night I went to my good friend, and telescope maker, Bill Burton's house to give the scope some time under the stars.  Although the seeing was bad, the transparency was good (in between high level clouds).  Some objects observed: NGC2903, NGC4565, M81, M82, The Eskimo Nebula, M3, M53, M94, The Black Eye Galaxy, The Sunflower Galaxy, Mars, Venus, Mercury, and Saturn.  It is nice to have the extra aperture.

Bill mentioned (and I noticed it too) the scope becomes stiffer at higher altitudes.  After talking it over with him, and reading the section on stiction in Dave Kriege's The Dobsonian Telescope ,  I calculated out what the teflon pad sizes should be.

I weighed the upper assembly (mirror box, trusses, secondary ring, and accessories), and it came to 60 pounds.  Divide the weight of the upper assembly by 4 to get the pounds per pad, which came to 15.  Dave recommends 15 pounds per square inch for the teflon pads.  Divide 15 by 15 and you get 1 square inch which is what I had on the altitude bearings already.

On to azimuth bearing, the total weight of the scope minus the ground board is 105 lbs.  Divide that by 3 (because I use 3 pads) and you get 35.  Again, using 15 lbs per square inch, divide 35 by 15 and you get 2.33 square inches.  Take the square root of that, and that comes out to about 1.5 inches per side for the bottom teflon pads.

I cut out 3 1.5" by 1.5" pads and mounted them to the ground board.  The scope moves noticeably smoother at the higher altitudes.

Thanks Bill!

Wednesday, March 31, 2010

Introducing "Electa"


After some final tweaks, "Electa" is done.  She is named after my great, great, great grandmother, Electa Ann Grubaugh Hissong who lived from 1841 to 1934.


Close-up of name tag I had made.  You can see a piece of brass stock I temporarily attached as well.  This will be replaced with a counterweight system from Scopestuff.com.


Here is the secondary ring with a Protostar, 3-vane spider and secondary.  The secondary is heated using Protostar's built in dew heater.  The light baffle on the other side of the ring is made of Kydex and I attached some Protostar flocking paper.


The focuser is a Kineoptics HC-2.  Dennis Steele from Dobstuff.com made the spider brackets focuser board.  The struts and strut seats are made by Moonlight Focuser.


"Electa" and "Ada" side by side.  This has been a great project.  I had so much fun and I learned a great deal.  First light was last night and I noticed I had the truss tubes cut about and inch short.  I was able to compensate for it by using spacers on the focuser.  The action was stiffer than I would have liked too.  This evening, I applied some Turtle Wax Express Shine Spray wax to the laminate bearing surfaces and the scope moves just like my old Obsession.  I observed M81, M82, M37, and Mars this evening.  I cannot wait to get her under dark skies!

Monday, March 29, 2010

Truss seats are here...

Truss seats attached to the mirror box.  Also have the dust cover finished.

 
Also got the baffle installed in the mirror box.

Thursday, March 25, 2010

Moonlight Struts

I ordered the Moonlight truss system yesterday.  Completion of the scope should be next week sometime.  I am trying something new to mechanically fasten the struts to the tubes.  I saw Teeter use this technique on his struts (he uses moonlight as well).  I will be using rivets to fasten the ball inserts into the tubes.  I picked up a rivet tool and some rivets and tried it out on my existing tubes on my 12.5".  They work great!  I also plan to run the connecting cables through one of the struts.  Ron Ravneberg did this on his scope and it really helps keep the scope nice and tidy.  I will test this on a leftover strut I have on the 12.5".  If it works out ok, I will use it on my 16".

Tuesday, March 23, 2010

First Light!!

First light! I used a 2x4 as a strut to get the exact measurement between the secondary ring and the mirror box. I estimated it to be 51". Turns out it is 50 3/4".  Now I just need to get the moonlight truss system and this will be done!  Got to see the moon eclipse a bright star too in the scope!
Closeup of the Protostar spider and the secondary ring.  You can see I used some clamps and scrap wood to attach the ring to the 2x4.

Mirror Box Completed...

Finished the rocker and mirror boxes a few days ago. Instead of painting it, my wife and some other ATMs convinced me to leave the wood a natural color. I like the results!!!  I used Minwax Gloss Oil Based Polyurethane.


This is a view of the back of the scope. There are two fans to blow air across the surface of the mirror. I also have a fan to blow on the back of the mirror. The top set of fans is controlled by one switch, the single fan that blows on the back of the mirror is controlled by a different switch. 


I decided to name the scope "Electa". My wife and I recently got into genealogy and I found out my great, great, great, great, grandmother was named Electa. I thought it was such a great name!

Here is a closeup of the bearing mounting. I decided to use threaded inserts on the mirror box, and finish nuts on the outside. It has a really nice appearance.


The bottom of the scope. Here you see the back fan.


Close up of the electronics.

Wednesday, March 17, 2010

Saint Patrick's Day Prominence

An amazing solar prominence was present on the limb of the sun on this wonderful Saint Patrick's Day.  This is my first real attempt at doing solar photography with my PST scope.

Sunday, March 14, 2010

Adding Polyurethane to the bearings

Decided to go ahead and finish the telescope with Polyurethane instead of painting it.  Really like the look better.

Ground Board finished


Made the ground boards today.  Instead of going with hockey pucks, I went ahead and used some plywood disks I had left over.

Friday, March 12, 2010

Laminate Installed... Secondary Ring just about done

Cemented the Ebony Star laminate this evening.  It always makes me nervous!  It fit just right.  I will be heading to Lowe's tomorrow to pick up a Flush Trim Bit for my router to get the extra laminate off.


Here is a shot of the secondary ring.  I need to get some longer bolts to go through the 3/4" spacers and some washers so the spacers are not digging into the plywood.  Dennis of www.dobstuff.com made the spider brackets (where the spider attaches to the bolt and spacer).  He also made the focuser board.  Great work Dennis!!  I also put a 10-24 threaded insert on the opposite side of the focuser board for the light baffle.  I will be using a threaded knob to attach the baffle.

Rocker Box just about done


Just about done with the rocker box.  I liked the tapered sides with the routed out circles.  Makes it look nice.  Instead of painting the rocker box, I have decided to Polyurethane it for a natural look.  The bearings will also have a natural look.  The mirror box will have a black textured paint and secondary ring will be flat black.  I used screws and glue for all joints.  Still wondering about whether I will glue the bearings on or bolt them.  And if I bolt them, should I use threaded inserts or not.

Wednesday, March 3, 2010

Rocker Box Coming Together

This past evening, I spent some time working on the rocker box.  Got the sides cut and rounded.  I am debating about whether I want to cut the circles in the rocker sides.  I think it will look nice.  It will save on some weight too.  My only concern is that the plies are not all totally glued and there may be some gaps.  Paint and some filler should cover it.  Decisions...

Thursday, February 25, 2010

Mirror Box Completed


I spent some time in the wood shop this evening and I got the mirror box done.  It turned out really well.  This time, I used screws (and later glue when the final assembly occurs) instead of the pocket holes on the 12.5" scope.


The back view.   The top hole will be used for the fan controls.  The two bottom holes are for the fans that will blow across the mirror face.


Bottom view.  The central hole is for the back fan.  The three larger holes are for ventilation.


View with the mirror.  It is slowly coming together!


Next up is finishing up the secondary ring and then the rocker/box ground board.